When you find yourself in the wild, one of the first things you need to think about is shelter. Protection from the elements — rain, wind, heat, or freezing temperatures — can mean the difference between life and death. The good news? You don’t always need a fancy tarp or tent. With a little know-how, you can build a survival shelter using only what nature provides.
In this guide, we’ll cover the basics of building a shelter with natural materials so you can stay safe, dry, and warm in any survival situation.
Why Shelter Matters in Survival
- Regulates body temperature – Hypothermia and heatstroke are killers in the wild. Shelter helps prevent both.
- Protects from weather – Rain, snow, and harsh winds can wear you down quickly.
- Provides safety – Keeps you hidden from predators and gives you a secure resting place.
- Boosts morale – Having a shelter creates comfort and peace of mind, essential for survival mindset.
Step 1: Choosing the Right Location
Before building, scout for a safe and practical spot:
- Avoid low-lying areas where water can collect.
- Stay away from dead trees or branches (widow-makers).
- Pick a spot with natural resources like leaves, branches, or rocks nearby.
- If possible, find natural features (caves, overhangs, large fallen trees) to use as a base.
Step 2: Collecting Natural Materials
Look for these basics around you:
- Branches & logs – For structure and support.
- Leaves, pine needles, grass – For insulation and covering.
- Vines or flexible saplings – To tie and lash pieces together.
- Mud, clay, or moss – For waterproofing and sealing.
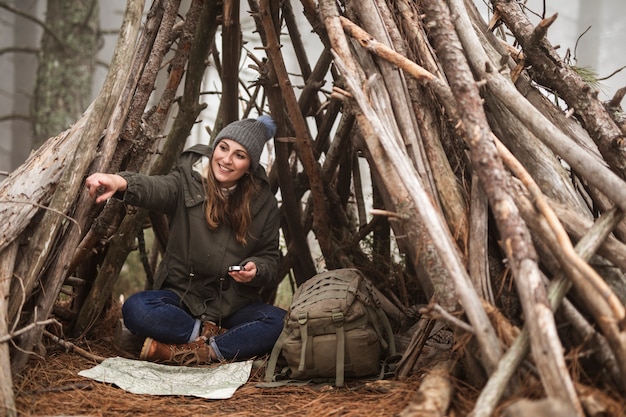
Step 3: Types of Natural Shelters You Can Build
1. Lean-To Shelter
- Find a sturdy fallen log or place a long branch against a tree.
- Lean smaller branches against it at an angle to form a wall.
- Cover with leaves, grass, or pine boughs for insulation.
- Best for quick protection against rain or wind.
2. Debris Hut
- Build a ridgepole supported between two trees or propped on a stump.
- Lean branches along both sides to form a triangular frame.
- Pile leaves, moss, and grass thickly over the frame (at least 2–3 feet).
- Crawl inside — your body heat will be trapped.
- Ideal for cold conditions when insulation is critical.
3. A-Frame Shelter
- Place a large branch horizontally between two supports (trees or forked sticks).
- Lean branches on both sides, forming an “A” shape.
- Cover with debris for weatherproofing.
- Stronger than a lean-to and can handle more weight.
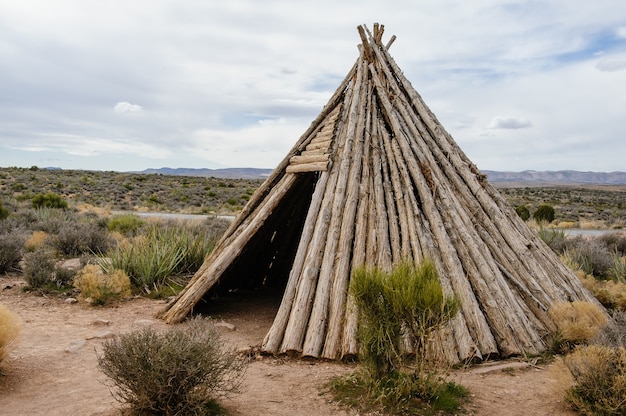
4. Wickiup (Cone Shelter)
- Use long saplings to create a tipi-like cone shape.
- Lash the tops together with vines.
- Cover with bark, grass, or branches.
- Great for long-term stays and works well with a fire inside (with ventilation).
Step 4: Insulation & Comfort
- Add leaf litter, pine needles, or grass inside the shelter as bedding.
- Keep at least 6–8 inches off the ground to avoid cold seeping in.
- Use moss or bark to seal cracks against rain and wind.
Pro Survival Tips
- Build small — a compact shelter traps heat better than a big one.
- Always check wind direction and build with your back to it.
- If using fire, build a heat reflector wall with rocks or logs outside your shelter.
- Practice these builds before you actually need them.
Final Thoughts
A well-built shelter is one of the top survival priorities — right up there with water and fire. By mastering these natural techniques, you’ll be able to adapt to almost any wilderness environment and stay alive long enough to make it home.
Nature provides everything you need. All it takes is skill, resourcefulness, and a calm mind to turn sticks and leaves into life-saving protection.